http://mail.gllm.ac.uk
Google Sites Introduction v2.1
Google Education has a facility for you to easily and quickly make mini websites. You can choose who you share your websites with.
Make your own sites for family, friends and even for your studies.
Login to your Student eMail at http://mail.gllm.ac.uk and click on the Sites link.
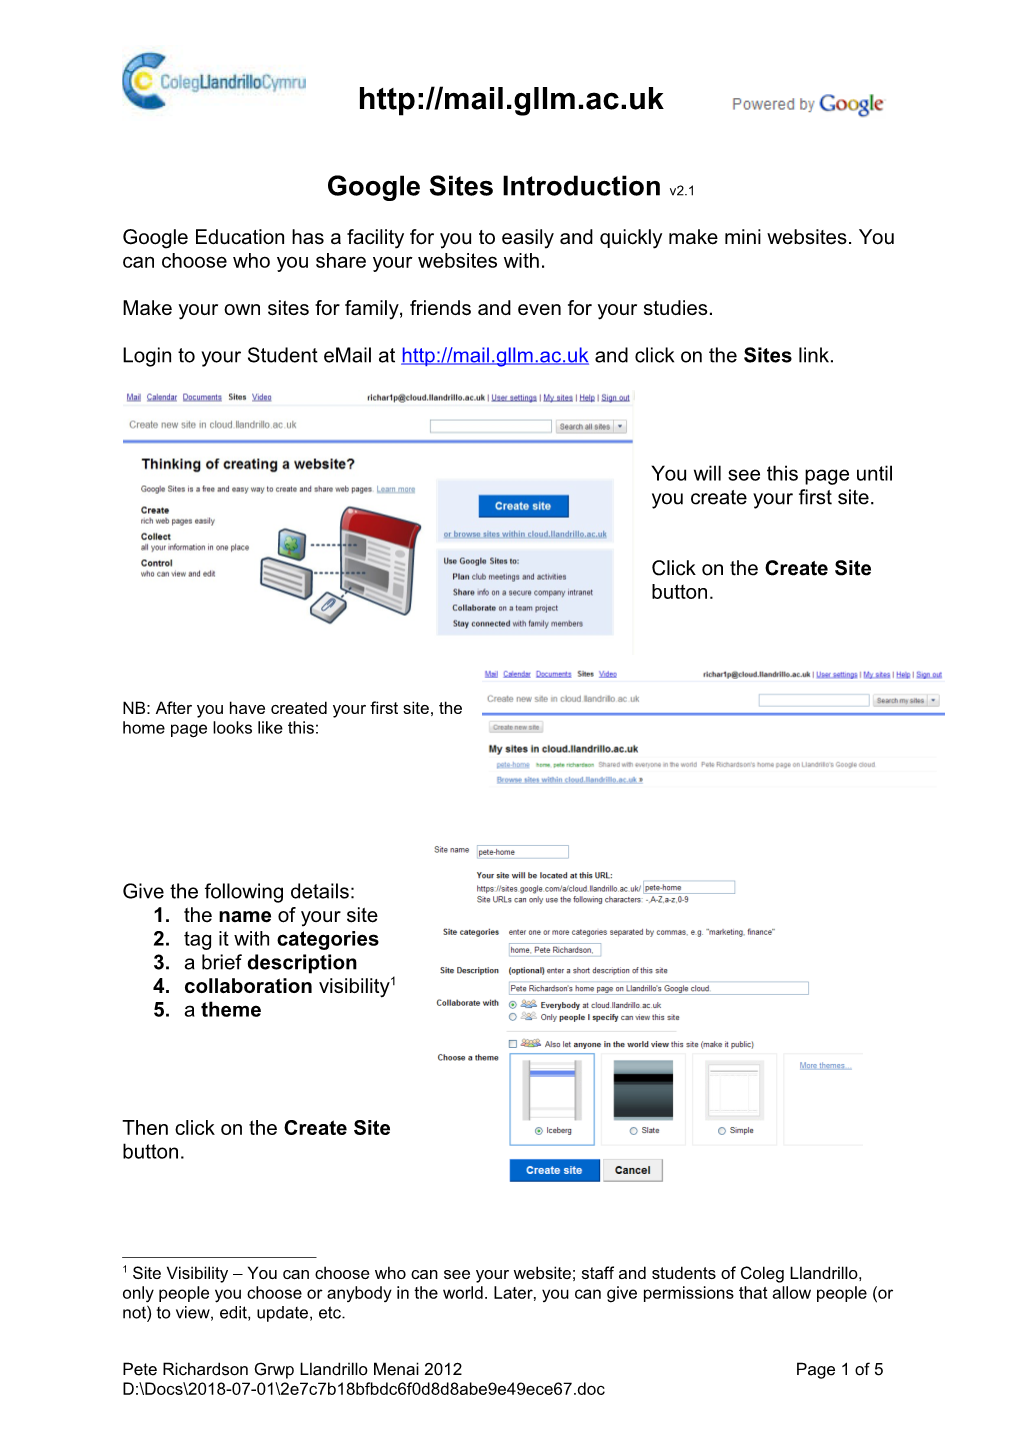
You will see this page until you create your first site.
Click on the Create Site button.
NB: After you have created your first site, the home page looks like this:
Give the following details:
1. the name of your site
2. tag it with categories
3. a brief description
4. collaboration visibility[1]
5. a theme
Then click on the Create Site button.
Click Yes if this box appears.
You are taken to your blank website.
Look at the browser location box and make a note of the web address of your page eg https://sites.google.com/a/gllm.ac.uk/example-google-site-1/
It is essential that you check your site settings at this point.
Click on the More Actions button at the top right of your page and then on Share This Site.
The ‘manage site’ area appears.
In the Advanced Permissions area, make sure that the view and edit permissions for your site are set in the way you want them.
If you have contacts already setup in your eMail (or you know somebody’s eMail address), you can give those individuals permission to own, collaborate or just view your site.
Changes to these settings are automatically saved as you make them (see the message that appears at the top of your page).
There are other settings you can check or adjust later on but for now, click on the Return to site link.
Back on your site home page, click on the Edit Page button.
Your page now has an editing toolbar ….
…. and text boxes where you can type and edit your site content.
Clicking the Save button (top right of page) will take you out of editing mode and back to your site home page.
Continued on p4 ….
You can add more pages to your site – click on the Create page button.
Select the type of page you want to create.
Give it a name.
Put it under your home page (Welcome in my example).
Click on Create
You go straight into editing mode for the new page.
NB: Notice that cloud101 comes under Welcome (the home page) in the left hand sidebar sitemap.
The bottom of your new page will have an Attachments and Comments facility.
You, and anyone you have invited as a collaborator (see bottom of page 2), can post comments and attachments to the page that other users can view.
For each page of your site, use the More Actions button and choose Page Settings to Allow (or not) the attachment and comment facilities.
Also on the More Actions button, there is the Preview page as viewer option which shows you what your page will look like to someone who doesn’t have any special permissions (like owner, collaborator, editor etc).
The Delete Page command is also found on the More Actions list.
VERY IMPORTANT NOTE:
The visibility and permission settings you choose to begin with apply to your website as a whole. Use the Share setting to Enable page-level Permissions to change who can see or edit individual pages of your site.
Click on the My Sites link at the top of your sites page.
This page lists the sites you have already made and has the Create new site button.
You can make sites with different visibilities and permissions (eg Personal/Private, For friends, For college (course group, project group, tutor etc),For the world wide web).
If you haven’t created your own websites before, you may need more help to make the most of this facility. See the Google Sites help pages at
http://sites.google.com/support/?hl=en .
Also, look out for the more Google Sites handouts during the term.
Pete Richardson Grwp Llandrillo Menai 2012 Page 5 of 5
H:\Google Apps\handouts\1_Login_to_Student_Mail_v1-1.doc
[1] Site Visibility – You can choose who can see your website; staff and students of Coleg Llandrillo, only people you choose or anybody in the world. Later, you can give permissions that allow people (or not) to view, edit, update, etc.